Tasks: Assign and Track Work With Your Account Team
Last updated: October 19, 2026
Tasks let you turn what you know about an account into a clear next step with an owner. Pick a teammate, attach the account and contacts, add context and a due date, and everyone can see where the work stands — no spreadsheets or side DMs.
Contents
Create a task
Create one task for several contacts
Mention teammates (and people not in Centralize yet)
Pair an exec with a customer exec
Update or complete a task
Find your tasks
Discuss a task with comments
Use Centra to help with tasks
Sync tasks to Salesforce
Need help?
Create a task
You can start a task wherever you're working:
The Tasks page → Create task
A contact card → Tasks tab → Create task
The Stakeholder Map → hover over a contact → + Task
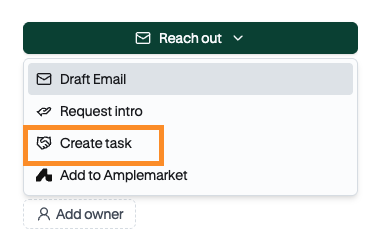
A contact’s Reach out ▾ menu → Create task
The Contacts table → select contacts → Create task
An account’s Summary page → Tasks → New task
The Org Chart → hover over a contact → Touchpoint
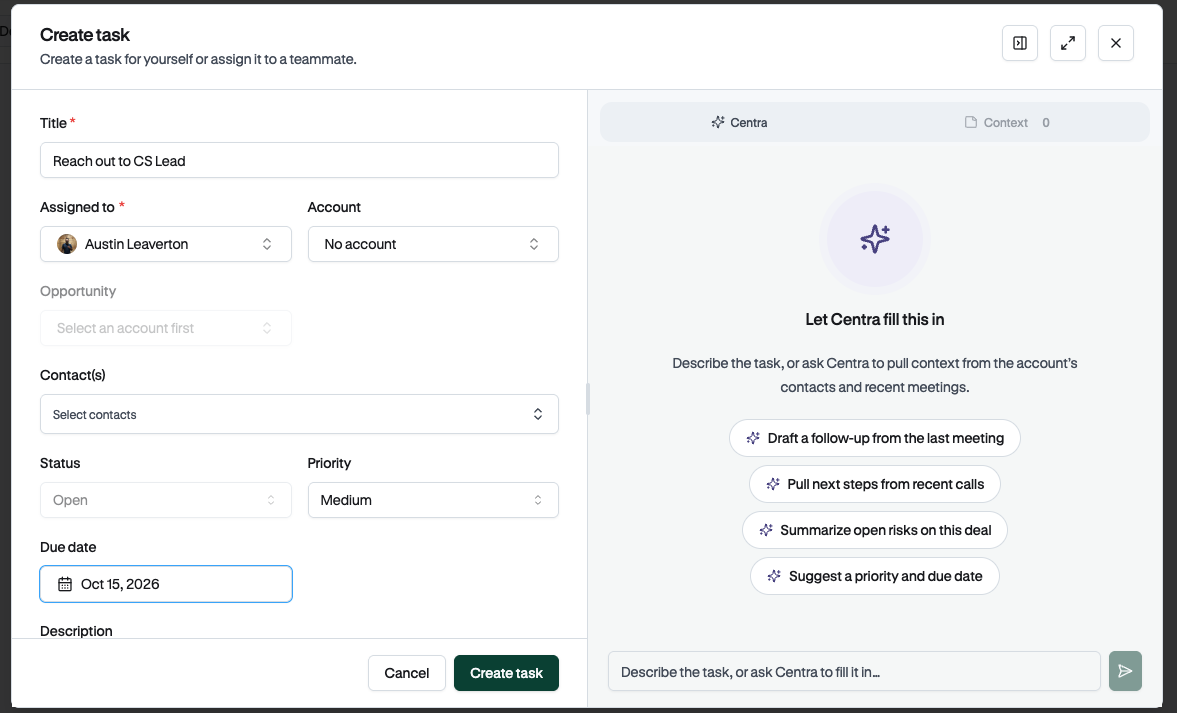
Enter a clear title.
Choose who it's Assigned to. Every task needs an assignee. If you start from a contact that has an owner, the owner is filled in for you. If the contact doesn't have an owner, Assigned to is left blank and you'll need to pick someone. From most other places, it's you by default. You can always change it.
Add the account, contacts, and opportunity (optional). If you started from a contact, the account and contact are filled in for you.
Optionally add a description, priority, and due date.
Click Create task.
The assignee is notified right away. See 📄 Notification Settings for how.
Note: Creating a task records who's responsible for the next step. It doesn't send an email or reach out to the customer for you.
Create one task for several contacts
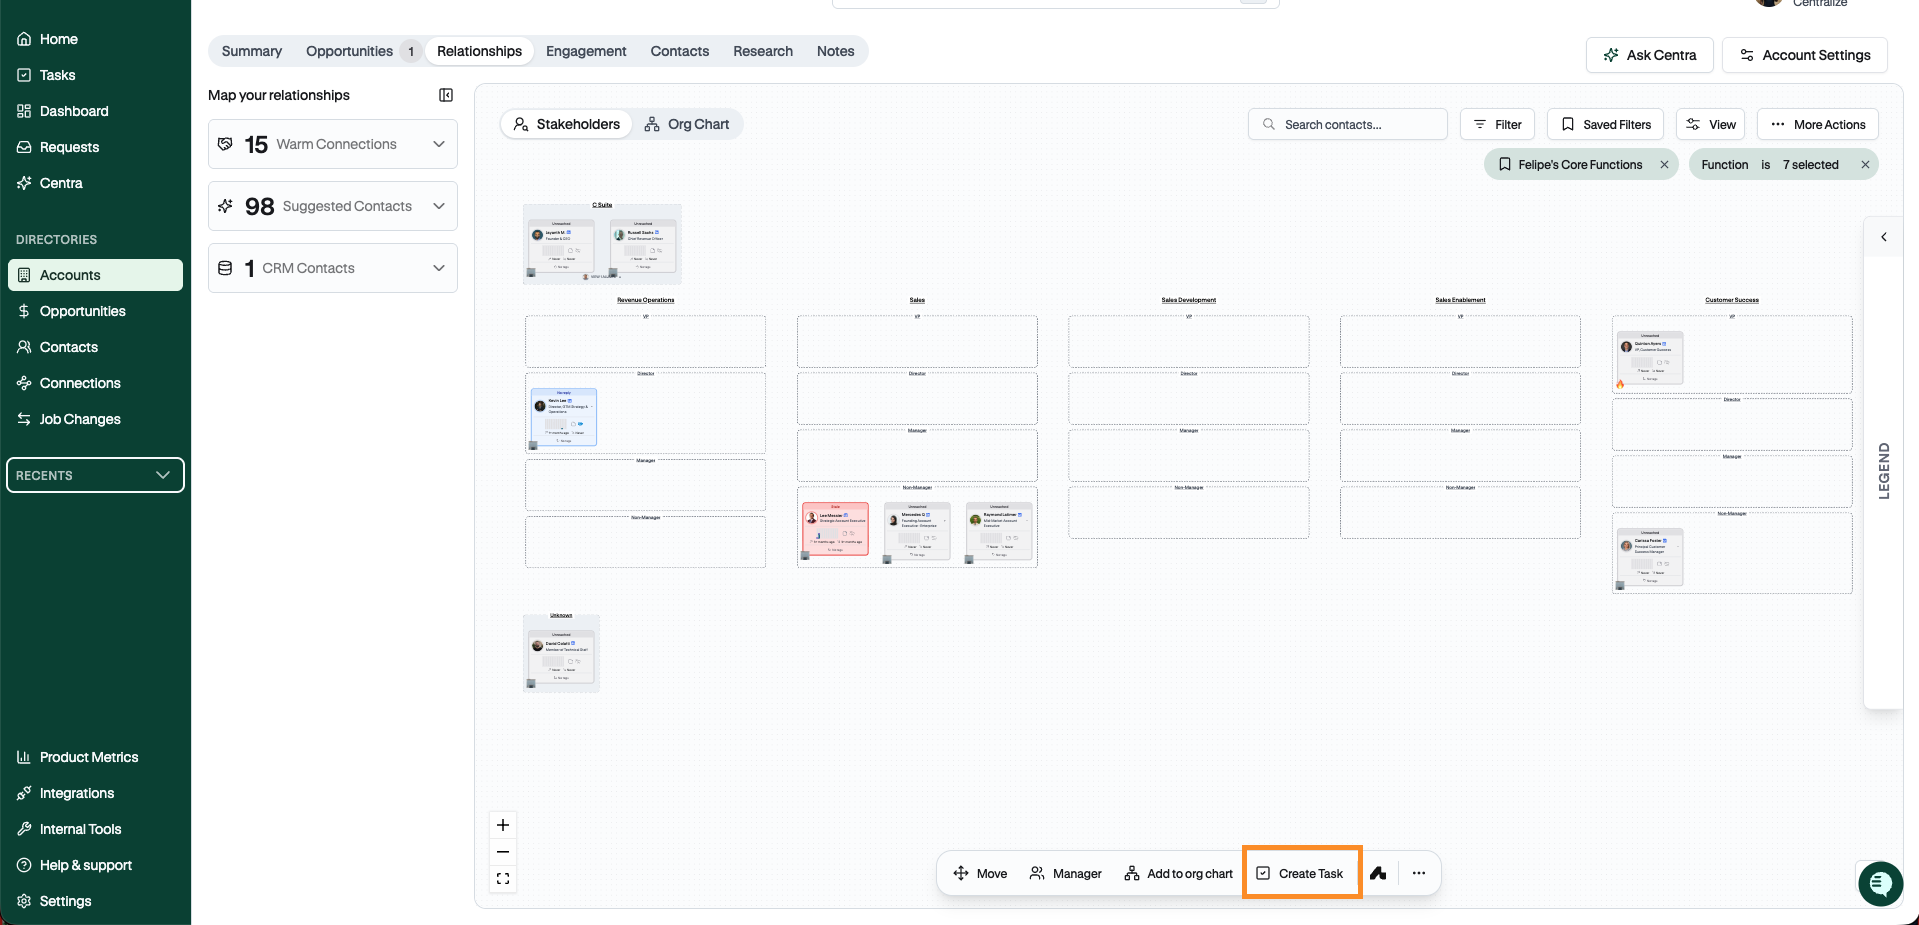
Open the account and go to Relationships → Stakeholders.
Click Create Task in the toolbar at the bottom of the map.
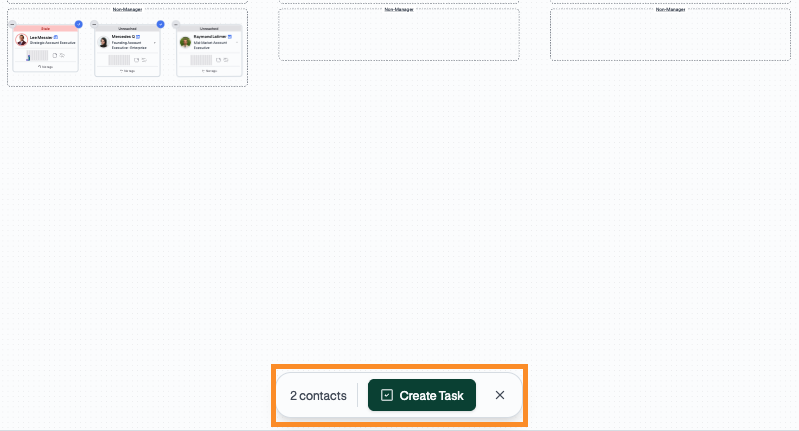
Click the contact cards you want to include.
Once you’ve selected your contacts, click Create Task next to the number selected.
Check the account and contacts, add a title (you’re the assignee unless you pick a teammate), then click Create task.
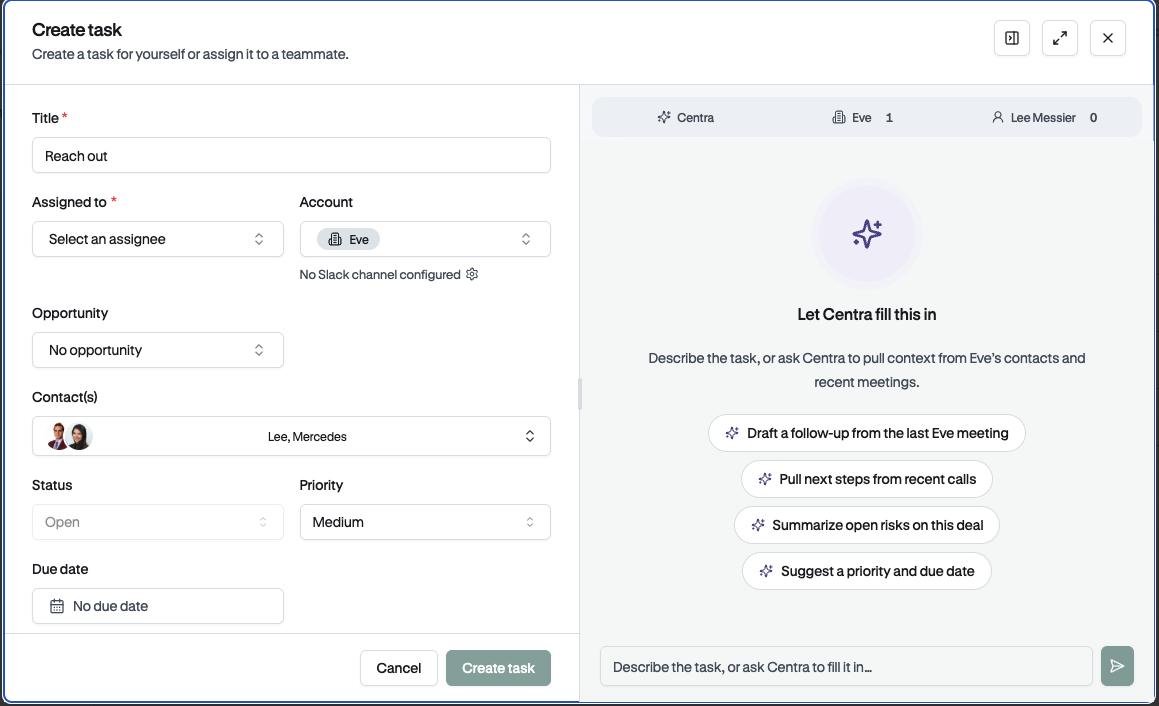
This creates one task linked to all the selected contacts, not a separate task for each.
Mention teammates (and people not in Centralize yet)
Type @ in a task description or comment and pick a teammate. They're notified and can click straight back to the task.
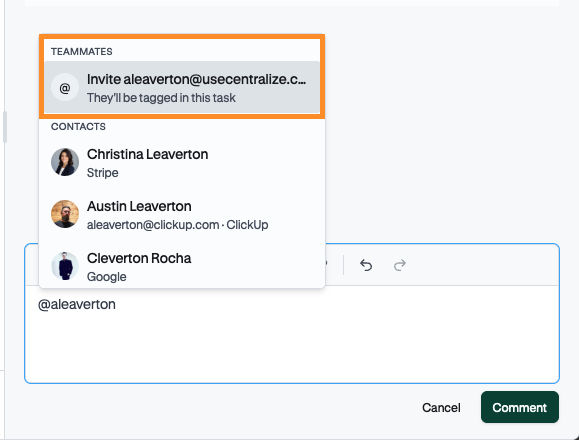
What if the person isn't in Centralize yet? You can type their work email in the @ menu (or the Assignee field) and invite them right from the task. This depends on your workspace's invitation settings — by default, invitations from mentions and invitations to email addresses outside your company are turned off. If you don't see the invite option, ask your admin. Joining the workspace doesn't give someone access to every account.
For the full flow, see 📄 Invite a Teammate From a Note or Task.
Pair an exec with a customer exec
Make your exec the contact’s owner, then assign them a follow-up task:
On the Stakeholder Map, open the customer exec's contact card.
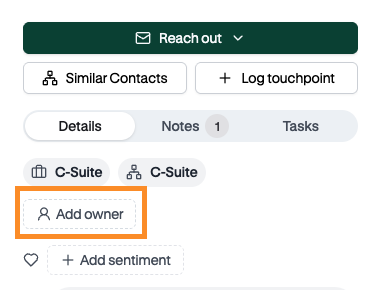
Click Add owner and choose your internal exec.
Click Reach out → Create task. The contact, account, and your exec (as the assignee) are filled in. Add context and a due date, then save.
Your exec is notified in Centralize and, depending on their notification settings, by email or Slack DM too, so they don't need to be in Centralize every day to act on it. For more, see 📄 Contact Owners, Following Contacts, and Planning Touchpoints.
Update or complete a task
Open the task to change the assignee, description, priority, due date, or status. When the work is done, mark it Complete. If it's no longer needed, Cancel it.
Note: A due date shows when work is due. It doesn't send reminders.
Find your tasks
On the Tasks page, use:
Assigned to me — work you're responsible for
Assigned by me — work you've handed to teammates
Completed — finished work
My Team — your team's tasks (if your workspace has a team hierarchy set up)
By contact — contacts grouped by how urgent their tasks are
Filter by account, contact, opportunity, or status. Your tasks also show on Home and on account pages. On the Stakeholder Map, use the Has Open Tasks filter. A contact card lists its open tasks (completed and canceled tasks aren't shown there), and the Contacts table has a Tasks column.
Discuss a task with comments
Open a task and click Comments → Add comment. The task's creator, assignee, and anyone who's already commented are notified. Only the person who wrote a comment can edit or delete it.
Note: If a task has a linked Slack thread, replies in that thread sync into the task's Slack conversation in Centralize, and replies you write in that conversation post back to Slack. Comments added only in Centralize stay in Centralize. See 📄 Work on Tasks From Slack: What Syncs and Which Way.
Use Centra to help with tasks
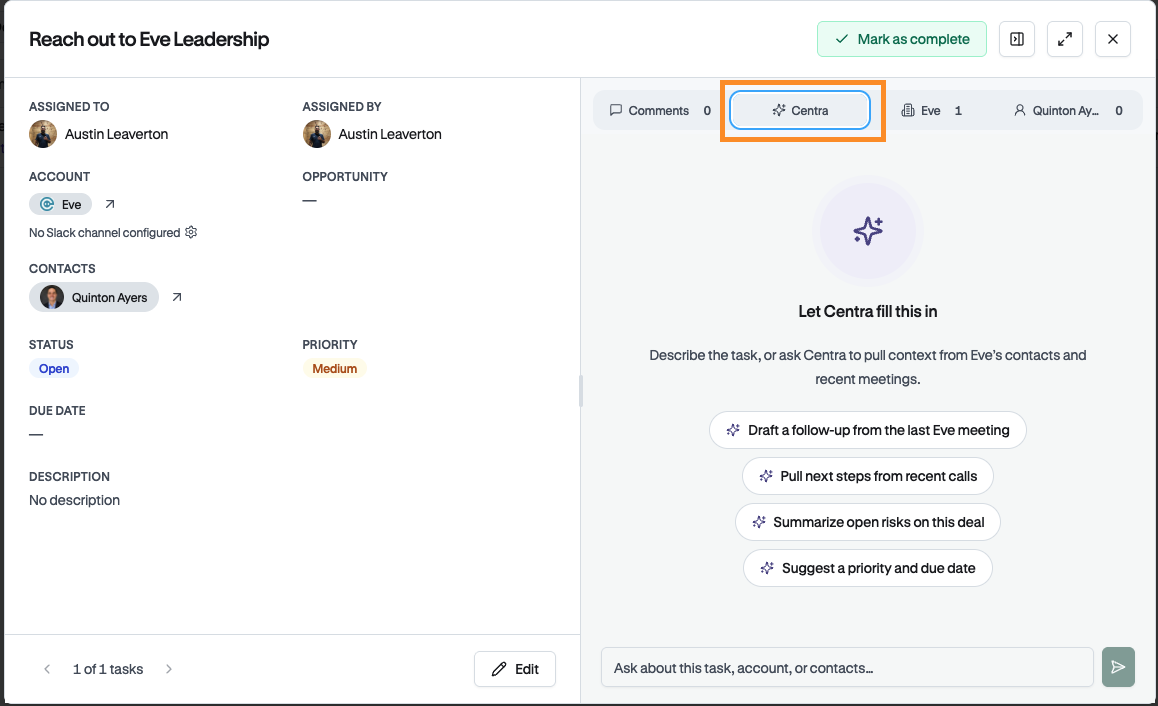
Inside a task, open the Centra panel to pull in account context or draft the task details. You review everything before saving. You can also create, update, or summarize tasks by asking Centra in the app, Centra in Slack, or Centralize in Claude (📄 Connect Centralize to Claude via MCP).
Try Draft a follow-up from the last meeting or Suggest a priority and due date.
Sync tasks to Salesforce
Your organization can turn on one-way task sync to Salesforce. It's off by default. See 📄 Connect Your Salesforce Account → Sync tasks to Salesforce.
Need help?
Contact support@usecentralize.com.