Using your Account Filters
Last updated: October 26, 2026
Use Account filters to narrow your account list to the right subset of accounts — by opportunity, ownership, engagement, CRM fields, and more — so you can prioritize outreach and track the accounts that matter most.
Contents
Before you start
Open the filter panel
Available filter options
Customize your columns
Save and reuse views
Need help?
Before you start
Account filters are available to all users from the Accounts tab.
Custom fields mapped from your CRM (e.g., account tier, territory, CSM ownership) are available as additional filter options.
Saved views can be kept private or shared with your full team.
Open the filter panel
Navigate to the Accounts tab in the left-hand sidebar.
Click Filter in the top toolbar to open the filter panel.
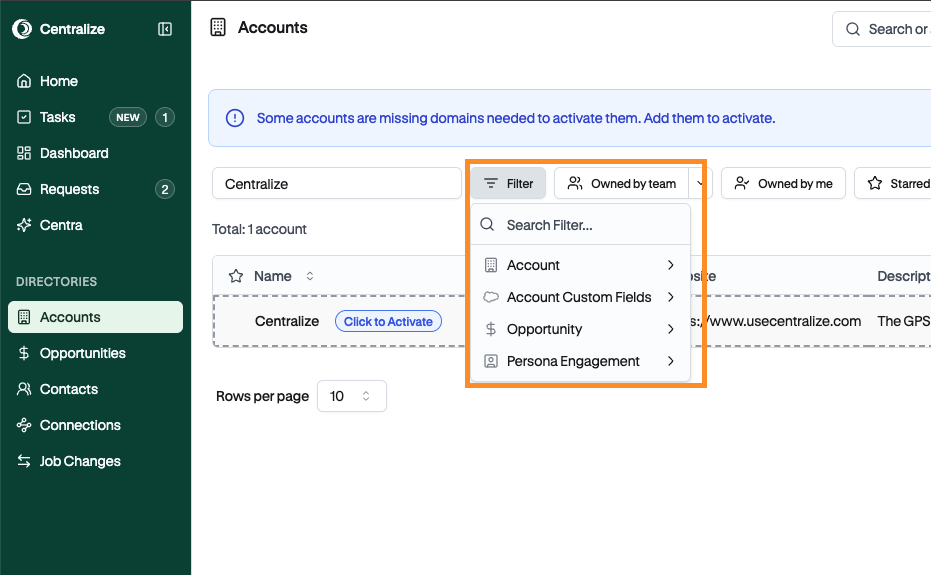
Click the custom fields icon to access CRM-mapped fields beyond the defaults.
📹 Walkthrough: How to Filter and Customize Account Views in Centralize
Available filter options
Once the filter panel is open, you can filter accounts by:
Custom Fields — access CRM-mapped fields like CSM ownership, SDR ownership, account type, tier, and territory.
Opportunity — filter by accounts with or without open opportunities.
Persona Engagement — filter by how engaged key personas are across the account.
Tip: To see just your accounts, click Owned by me on the Accounts page. Your admin decides which Salesforce owner fields count toward "your" accounts — see 📄 Account Ownership Fields. To narrow further, filter by custom fields like territory or account tier.
Customize your columns
Once your filters are set, you can adjust which columns appear and in what order.
Click Edit columns in the toolbar.
Drag and drop columns to reorder them.
Toggle columns on or off to surface the metrics most relevant to your workflow.
Save and reuse views
For any account list you plan to revisit, save it as a view so you don't have to rebuild the filters each time.
Set your desired filter and column options.
Click Saved Views and give your view a name.
If the view is only for you, leave Make available to everyone deselected. If you want teammates to access it, enable that toggle.
Tip: Check existing saved views before creating a new one — a teammate may have already built what you need.
Need help?
If you're having trouble filtering accounts or saving a view, contact support@usecentralize.com for assistance.