Activating Your Accounts
Last updated: October 20, 2026
Contents
Why activate accounts?
Activating accounts manually
Deactivating accounts manually
Swapping an activated account for a different one
Automatic activation (rules-based)
Settings explained
Excluded accounts
Limitations
Need help?
Why activate accounts?
Activating an account is one of the most important steps in your Centralize setup. Once an account is active, Centralize starts syncing touchpoints (emails, calls, calendar events), surfacing warm connections across your team, populating suggested contacts for multi-threading, and mapping the account's stakeholder org chart using its Salesforce domain. An unactivated account's relationship data won't populate.
Before an account can be activated, it needs to be imported from your CRM — Centralize identifies accounts (and matches their LinkedIn page) using the domain mapped in Salesforce.
There are two ways an account becomes activated: manually, by a rep or admin, or automatically, when it matches your organization's activation rules.
Activating accounts manually
Filter down to the accounts you want (by customer status, ownership, prioritization, or opportunity stage)
Click Activate Accounts to enter the activation view
Select specific accounts, or use Select All
Click Activate Accounts again to proceed
Review your selection on the confirmation page
Click Activate to confirm
Manually activated accounts are pinned. They stay active and won't be turned off by your activation rules later, even if they don't match.
Who can activate manually depends on your role:
Admins and Owners can always activate accounts, even when your organization uses activation rules. This works everywhere you can activate an account: an account's Account Settings, the bulk Activate Accounts view, CSV import, the Chrome extension, and Centra.
Members can only activate an account that doesn't match your rules if an admin has turned on Allow one-off account activation (see Settings explained below). Otherwise, they'll see a message asking them to contact an admin.
Deactivating accounts manually
Admins and Owners can deactivate an active account at any time. This is helpful when your rules activate an account your team doesn't plan to work, and you'd like to free up that spot for a different account.
Open the account and click the gear icon in the top right to open Account Settings.
At the bottom of the Account Settings window, click Deactivate account.
Click Confirm deactivation to finish, or Cancel to keep the account active.
Deactivating stops new data from syncing for the account. Any data that was already synced stays available.
If your organization uses activation rules, a manually deactivated account is also added to your Excluded accounts list, and your rules won't turn it back on, even if it still matches. If an admin activates the account again later, it's removed from the list automatically.
Members can't deactivate accounts.
Swapping an activated account for a different one
If your rules activated an account your team doesn't plan to work, an admin can swap it for one you'd rather focus on:
Deactivate the account you don't need (see Deactivating accounts manually above). It's added to your Excluded accounts list, so your rules won't turn it back on.
Activate the account you want to work instead (see Activating accounts manually above). It's added to your Individual accounts list and stays active even if it doesn't match your rules.
You can review both changes on the Settings > Administration > Account activation page.
Automatic activation (rules-based)
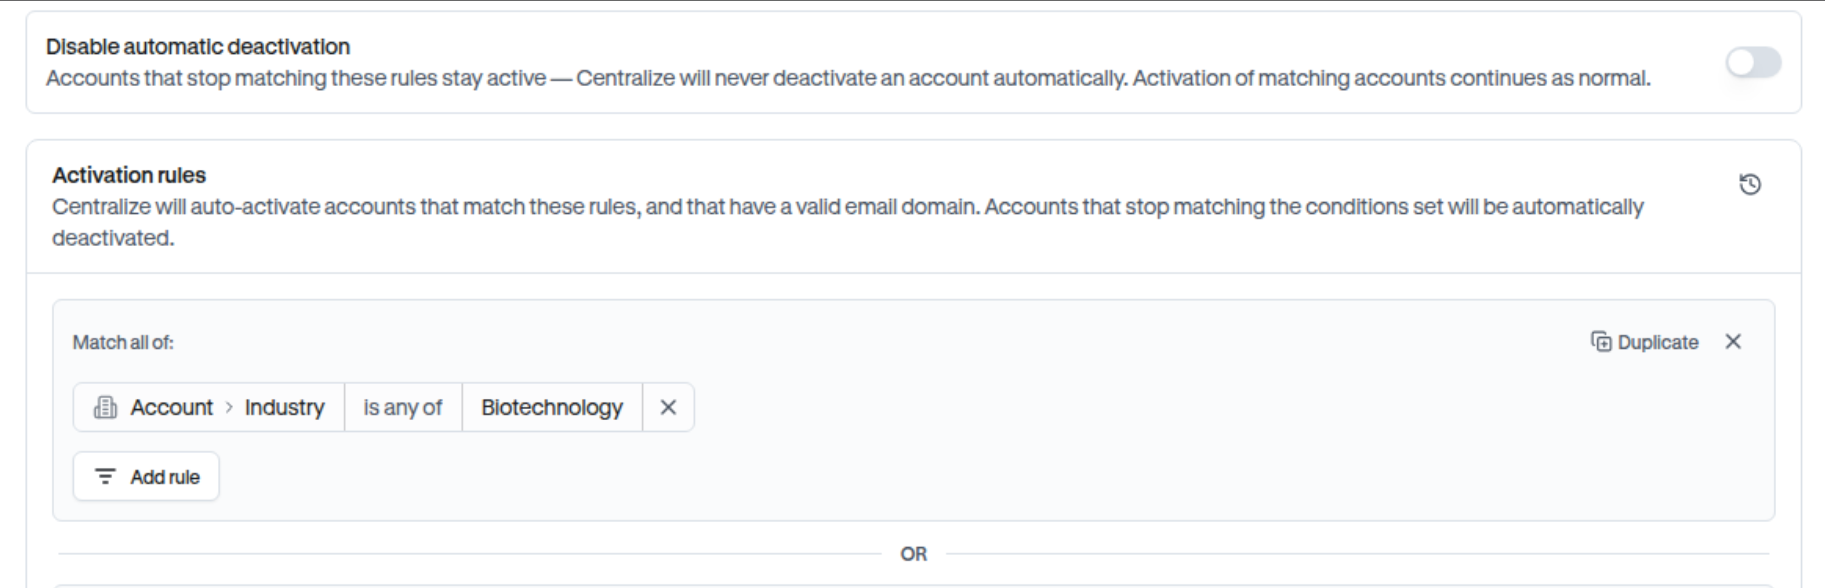
For larger teams, an admin can configure Activation rules under Settings > Administration > Account activation. Centralize checks every account against these rules and automatically activates any account that matches and has a valid email domain. Accounts are re-checked on an ongoing basis, so an account's activation status can change automatically as it starts or stops matching your rules — unless you've turned that off (see Disable automatic deactivation below).
Building a rule
Rules are organized into groups. Within a group, every condition must match ("Match all of"); groups themselves are combined with OR, so an account only needs to match one group to qualify. Add another condition to a group with Add rule, or add a whole new group with Add group. You can build conditions on:
Account fields, including custom Salesforce fields (e.g., Industry, Tier, Account ID)
Opportunity fields, including custom fields
Owner fields (e.g., Account Owner)
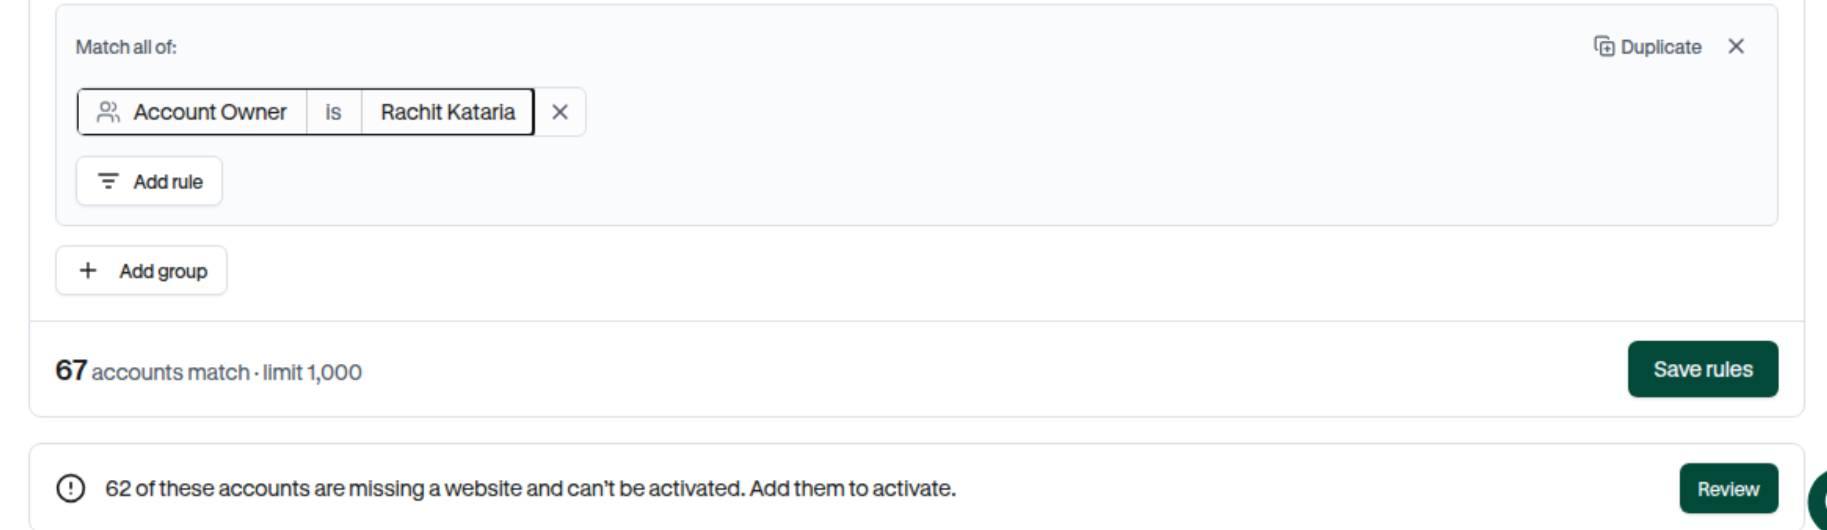
As you edit rules, Centralize shows a live count of how many accounts currently match, so you can sanity-check a change before committing it with Save rules.
Individual accounts
At the bottom of your Activation rules, the Individual accounts group lists accounts that are activated by hand, along with their Salesforce IDs. These accounts stay active whether or not they match a rule.
An account is added here automatically when it's activated manually, whether from Account Settings, the bulk Activate Accounts view, CSV import, the Chrome extension, or Centra, including by a member using Allow one-off account activation.
To remove an account, an admin clicks the × next to it and then clicks Save rules. Removing an account doesn't deactivate it right away. If it doesn't match any of your other rules, it's deactivated the next time your rules run, unless Disable automatic deactivation is on. To make sure your rules never turn an account back on, deactivate it instead (see Deactivating accounts manually).
Members can view and search this list but can't change it. Accounts a member doesn't have access to show as "Unknown account" with their Salesforce ID.
Handling accounts with no domain
Since activation depends on having a domain, an account that matches your rules but has no website on file can't be activated automatically. Centralize flags these next to your match count and lets you resolve them (by adding a domain) from the Review link.
Settings explained
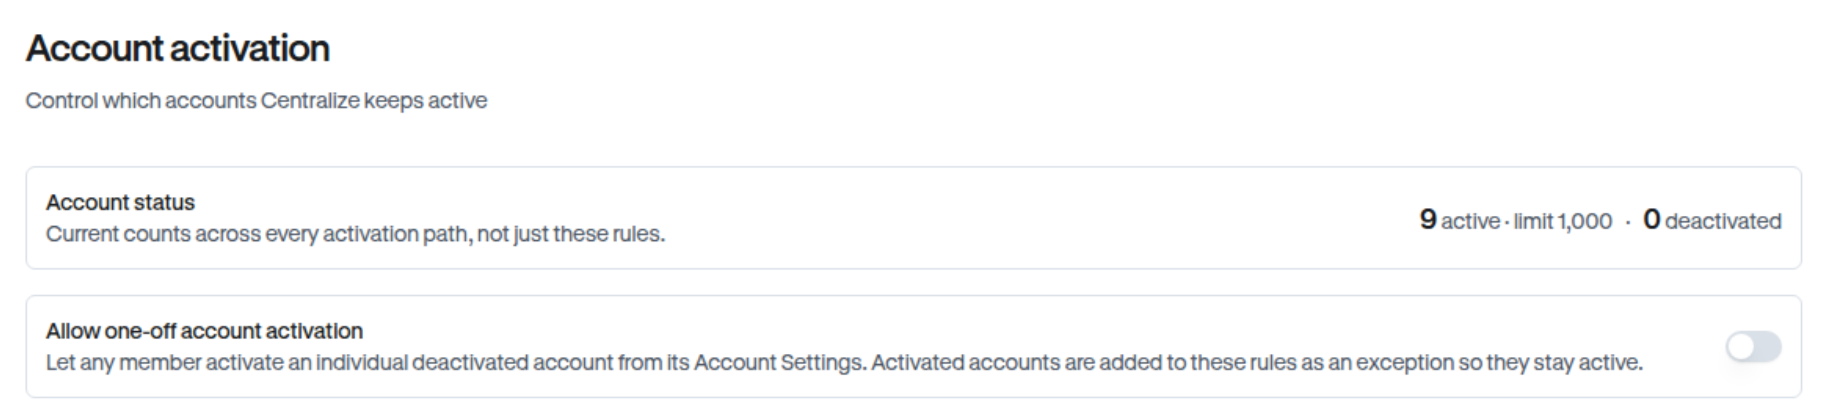
Allow one-off account activation
This setting lets members activate a single deactivated account from that account's Account Settings, even if it doesn't match your rules. Accounts activated this way are added to your rules as an exception, so they stay active going forward.
Admins and Owners don't need this setting turned on. They can always activate accounts.
Disable automatic deactivation
By default, an account that stops matching your rules is automatically deactivated the next time it's checked. Turning this on changes that: accounts that are already active stay active even if they later fall out of your rules. Centralize will still activate newly-matching accounts — it just won't turn any off automatically. Turn this on if you'd rather review potential deactivations yourself than have them happen automatically.
Account status
A running count at the top of the settings page showing active accounts, deactivated accounts, and your account limit — combined across every way an account can become activated (rules, manual, one-off), not just what's configured in your current rules.
Tip: Before saving a rule change, check the live match count. A rule that's broader or narrower than intended can activate or deactivate a lot of accounts the next time rules run — if you'd rather only add accounts automatically and never remove them, turn on Disable automatic deactivation first.
Excluded accounts
The Excluded accounts list is on the Settings > Administration > Account activation page, directly under the Activation rules box. It shows every account an admin has manually deactivated, along with each account's Salesforce ID. The list only appears once at least one account has been excluded.
Your rules won't activate excluded accounts, even when they match.
Excluded accounts aren't included in the live match count or the preview of matching accounts.
To let your rules activate an account again, an admin can click Remove next to it. This takes effect right away; the account is activated the next time your rules run if it still matches. Rules run automatically about every 30 minutes, and whenever an admin saves rules.
Members can view the list but can't change it. They only see excluded accounts they have access to, plus a count of any others.
If you open See details on an excluded account, you'll see a note that an admin deactivated it by hand and that the rules won't activate it again until an admin does.
Limitations
Auto-activation rules currently run against Salesforce data only, via your Salesforce connection. Support for other CRMs isn't available yet.
An account needs a valid email domain to be activated at all, whether manually or automatically.
Bulk (manual) activation is capped at 200 accounts per action.
Configuring activation rules is admin-only. Members who try to activate an account that's blocked by your rules will see a message asking them to contact an admin. Admins and Owners aren't blocked by the rules.
Need help?
If something looks off with account activation or you have questions, reach out to us at support@usecentralize.com.
Related articles
Connect Your Salesforce Account
Update Your SFDC Field Mappings
Manage Team Integrations